> ## Documentation Index
> Fetch the complete documentation index at: https://docs.droidoxy.com/llms.txt
> Use this file to discover all available pages before exploring further.
# Google Login
> Seamlessly integrate Google OAuth 2.0 authentication into your Pocket Script application, allowing users to log in with their Google accounts. This guide walks you through the setup process, from creating a Google API project to configuring Pocket Script for a smooth "Login with Google" experience.
## Overview
Integrating Google as an identity provider offers your users a convenient and secure way to access your Pocket Script application. This feature leverages Google's OAuth 2.0 protocol, ensuring a streamlined authentication process while maintaining high security standards.
Before you begin, ensure you have admin access to your Pocket Script application and a Google account for setting up the OAuth integration.
## Getting Google Client ID and Secret
1. Go to [https://console.developers.google.com/apis](https://console.developers.google.com/apis)
2. Navigate to the `Credentials` tab
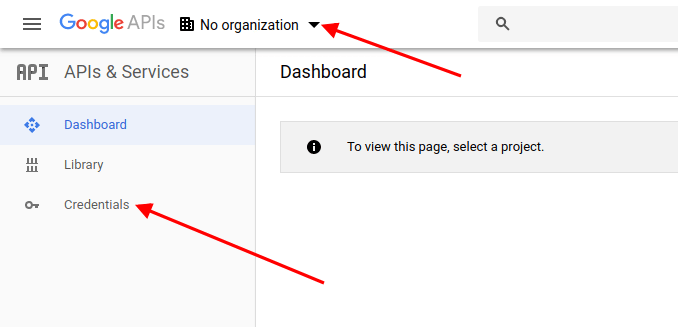 3. Click `Select a project --> New Project` and then click the button `Create` OR if you've created a Firebase project while setting up the **Pocket Android App**, then you can select the existing project and **skip to Step 6**
4. Navigate to the tab **OAuth consent screen**
3. Click `Select a project --> New Project` and then click the button `Create` OR if you've created a Firebase project while setting up the **Pocket Android App**, then you can select the existing project and **skip to Step 6**
4. Navigate to the tab **OAuth consent screen**
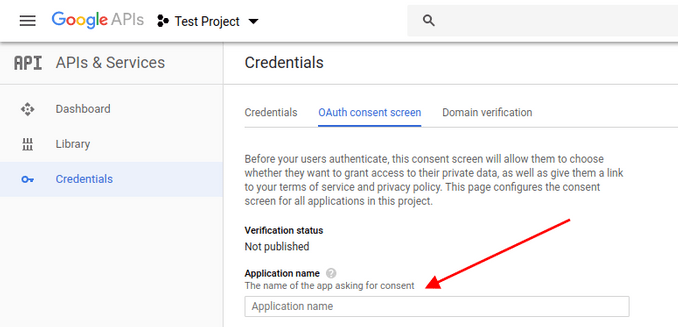
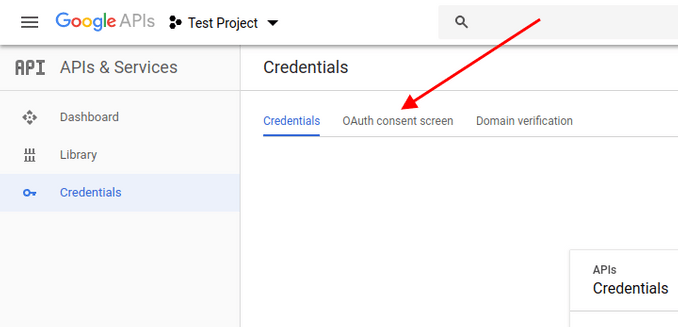 5. Enter the **Application name**, **Authorized domains** and click the button **Save**
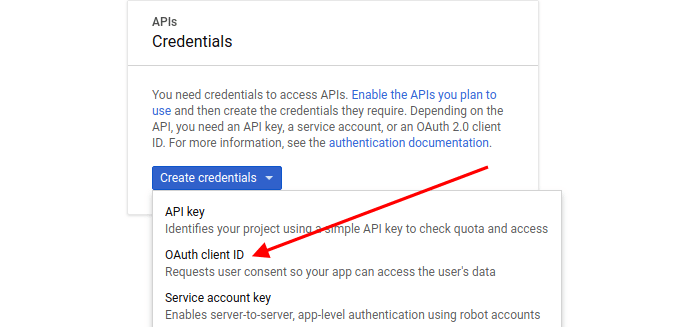
 6. Click the button `Create Credentials` and from the dropdown list select `OAuth client ID`
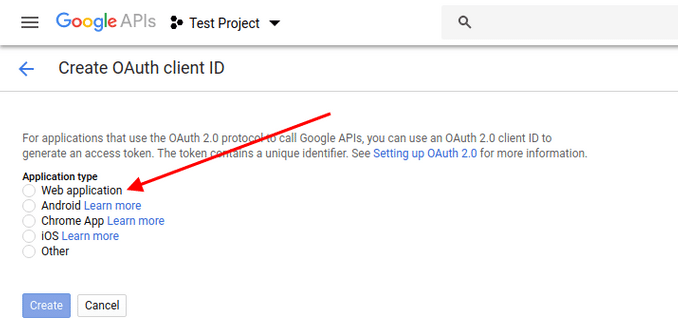
 7. From the **Application type**, select the `Web application`, enter **Authorized JavaScript origins** and click **Create** button
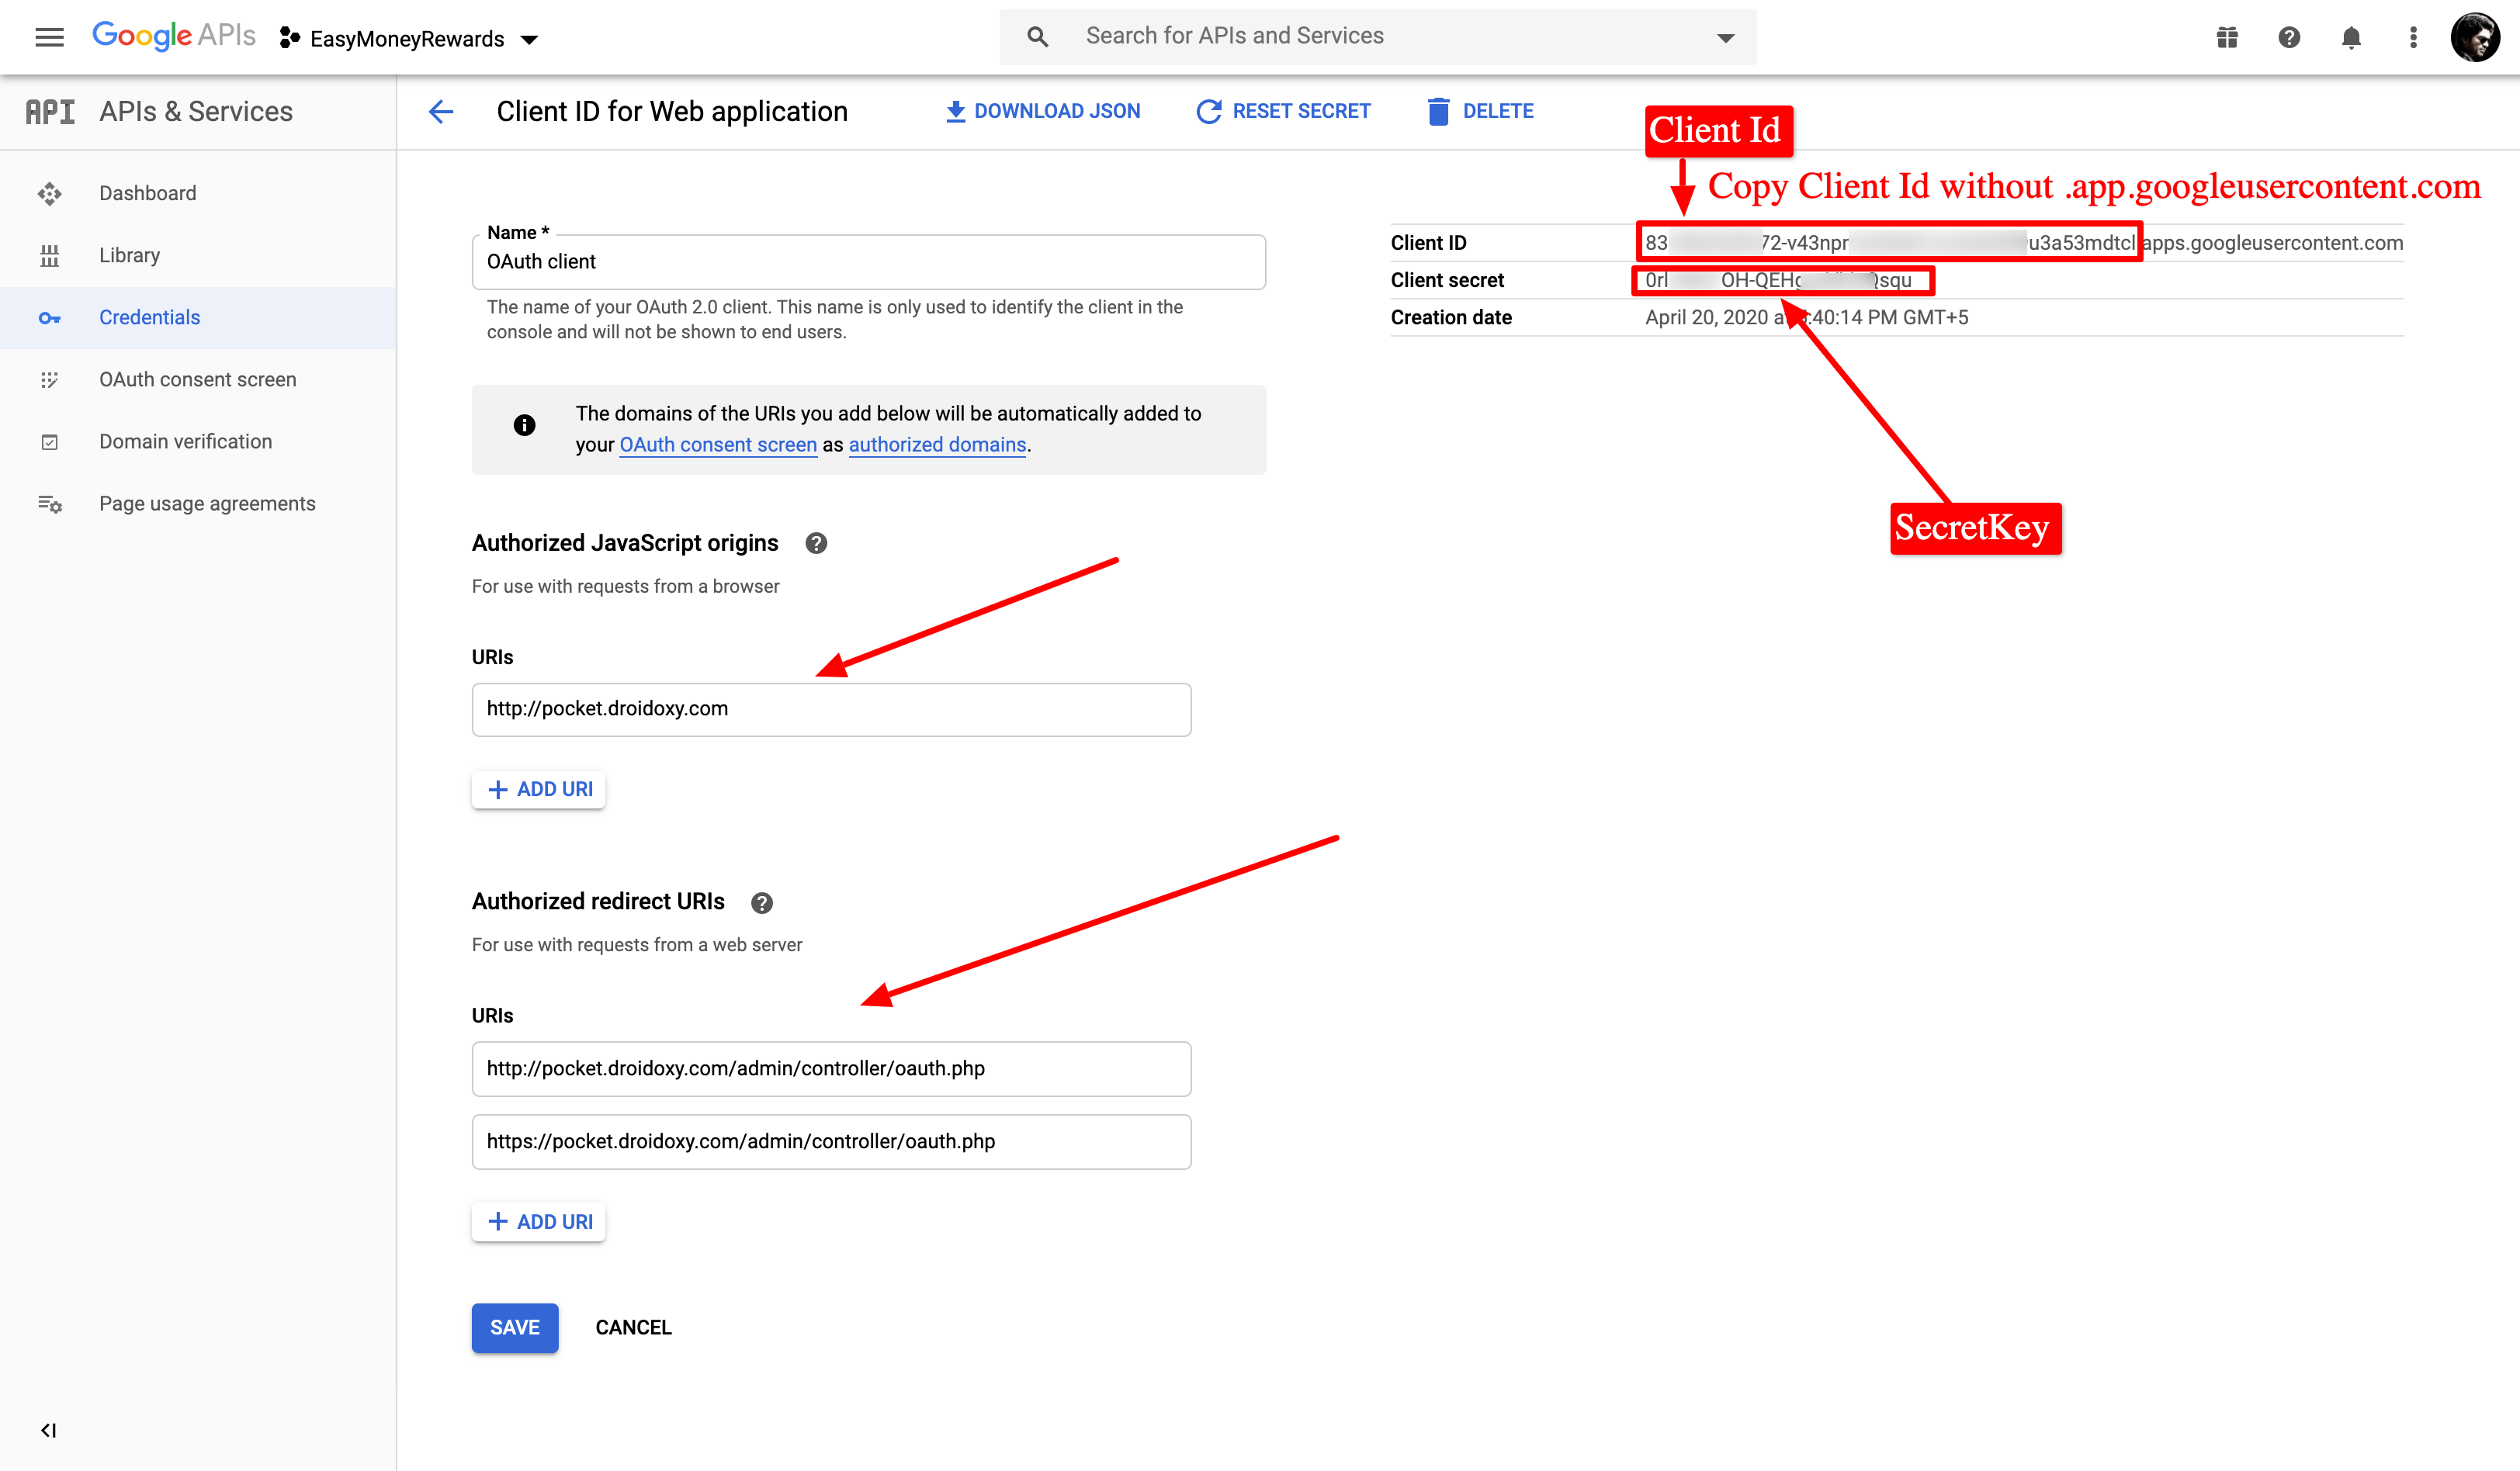
1. Authorized JavaScript origins
Authorized JavaScript origins will be your website URL
* Whether you install the script in the main domain or a subfolder, the final URL here will be your main domain. Enter your URL as:
```
https://example.com
```
* In case of a subdomain, enter your URL as:
```
https://subdomain.example.com
```
2. Authorized redirect URIs
For Authorized redirect URIs, append `admin/controller/oauth.php` to your website URL
* For the main domain install at ***example.com***, enter your URL as:
```
https://example.com/admin/controller/oauth.php
```
* For sub-domain install at ***subdomain.example.com***, enter your URL as
```
https://subdomain.example.com/controller/oauth.php
```
* For subfolder install at ***example.com/subfolder***, enter your URL as
```
https://example.com/subfolder/controller/oauth.php
```
7. From the **Application type**, select the `Web application`, enter **Authorized JavaScript origins** and click **Create** button
1. Authorized JavaScript origins
Authorized JavaScript origins will be your website URL
* Whether you install the script in the main domain or a subfolder, the final URL here will be your main domain. Enter your URL as:
```
https://example.com
```
* In case of a subdomain, enter your URL as:
```
https://subdomain.example.com
```
2. Authorized redirect URIs
For Authorized redirect URIs, append `admin/controller/oauth.php` to your website URL
* For the main domain install at ***example.com***, enter your URL as:
```
https://example.com/admin/controller/oauth.php
```
* For sub-domain install at ***subdomain.example.com***, enter your URL as
```
https://subdomain.example.com/controller/oauth.php
```
* For subfolder install at ***example.com/subfolder***, enter your URL as
```
https://example.com/subfolder/controller/oauth.php
```
 8. Copy your `Client ID` and `Secret Key`
 ## Final Steps
Paste the copied keys in your admin panel by following the steps below
* Log in to your Admin Interface (Pocket script instance)
* Navigate to `Settings -> Configuration -> Web App Configuration` from the admin sidebar
* Scroll down to the `Social Login` Section
* And paste the copied `Google Client Id` and `Google Secret Id`
That’s it!
## Need Help?
If you need any help or assistance, we're here for you! Please [reach out to our support team](https://droidoxy.com/support/)
## Final Steps
Paste the copied keys in your admin panel by following the steps below
* Log in to your Admin Interface (Pocket script instance)
* Navigate to `Settings -> Configuration -> Web App Configuration` from the admin sidebar
* Scroll down to the `Social Login` Section
* And paste the copied `Google Client Id` and `Google Secret Id`
That’s it!
## Need Help?
If you need any help or assistance, we're here for you! Please [reach out to our support team](https://droidoxy.com/support/)